|
|
eCourts Portal of Western Australia - Help: Upload Requested Items |

Some jurisdictions support fulfilling a subpoena/summons to produce an item, electronically. You will know that this is the case as a set of instructions will have been included with the subpoena/summons.
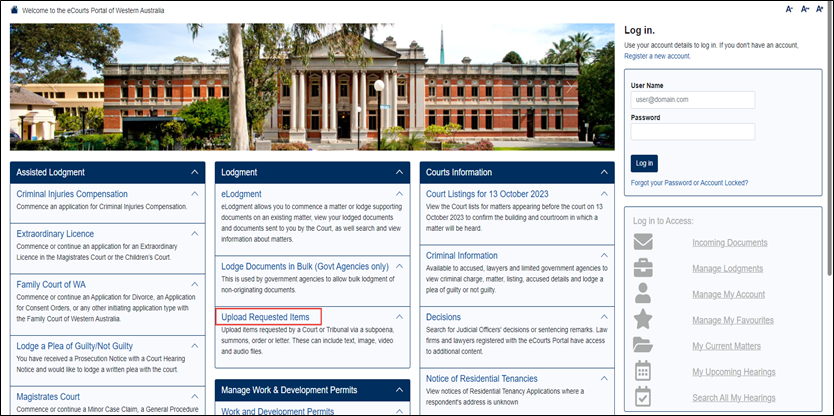
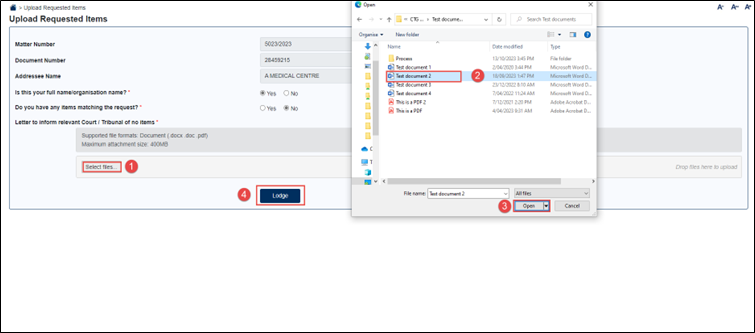
01. Click on the link Upload Requested Items.
NOTE: You don’t need to log into an eCourts Portal account to do this.
The Upload Request Items screen displays.
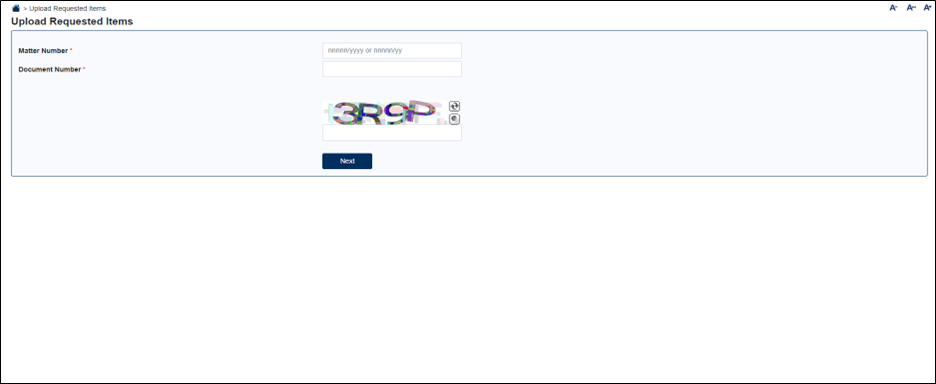
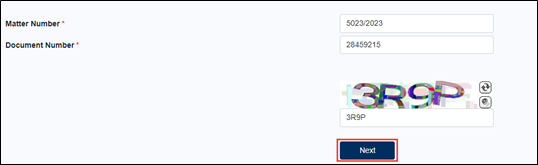
02. Enter the relevant matter number in either of the following formats: nnnnn/yyyy or nnnnn/yy
Matter number is entered in the correct format.
03. Enter the relevant document number.
The document number from your lodging instructions is entered.
04. Enter the CAPTCHA code, then press Next.
If an addressee has been pre-linked to the request, then the Addressee Name field will be pre-populated. If not, then you will need to enter the name yourself.
05. If the Addressee Name has been pre-populated, then check that the Addressee Name is correct.
If so, tick Yes to Is this your full name/organisation name?

06. If Addressee Name is not correct, tick No to Is this your full name/organisation name?
07. Select appropriate name type of Person or Organisation, then enter correct Addressee Name.

08. Confirm Yes or No for Do you have any items matching the request?
09. If No, click Select files… to upload single a Word document to inform the relevant Court / Tribunal. Then, press Lodge.
10. If Yes, the option to Select an attachment will be displayed.
NOTE: Here are the rules regarding what can be uploaded:
- Up to 500 attachments at a time.
- The maximum size limit per attachment is 400MB.
- Upload formats:
- Documents: .docx; .doc; .docm; .rtf; .pdf; .txt; .html
- Spread Sheets: .xls; .xlsx; .xlsb; csv
- Music/Videos: .mp3; .mp4; .wma; .f4v; .wmv; .vob; .mts; .mov; .m4v; .avi
- Images: .bmp; .gif; .tif; .tiff; .jpg; .jpeg; .png
- Power Points: .ppt; .pptx
- Emails: .msg; .eml
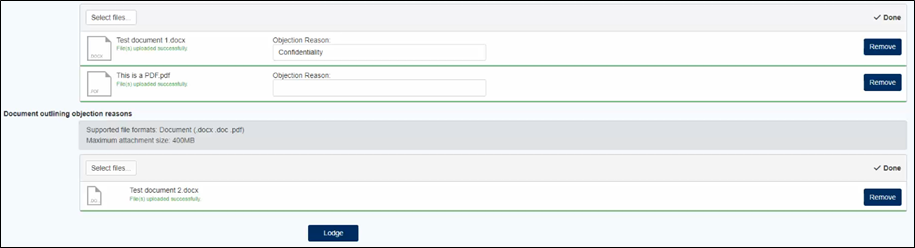
After uploading, all the relevant files appear in a table below the Select Files button.

10. If you want to record an objection, enter an objection reason in the Objection Reason text field.
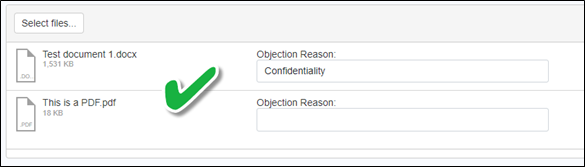
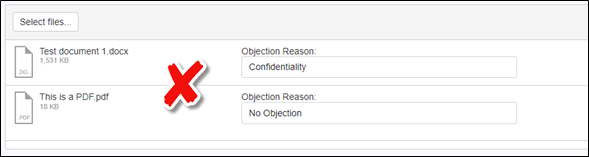
For all attachments that you don’t object to, you MUST leave the Objection Reason field BLANK.
11. An option to upload a single Document outlining objection reasons is also available.

This can be a letter to the relevant Court or Tribunal or a prescribed form (e.g. Family Court – Part F: Notice of objection – subpoena).
12. Click the Lodge button.
Each file is marked as being uploaded.
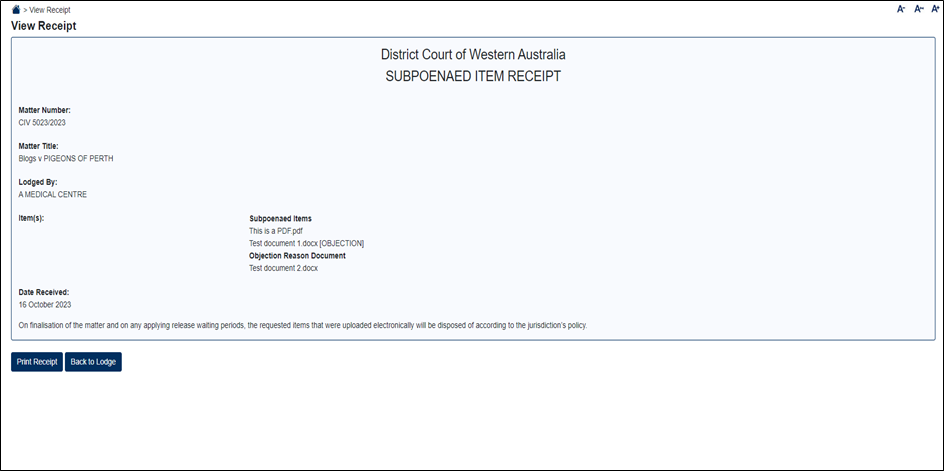
After all files are uploaded successfully, then the View Receipt screen is displayed.